Guide to EasyCargo API (part 2)
As we mentioned in the first part of this article, today we will approach the EasyCargo API from a more practical side. We will use our API client for this. We will also test the API’s operation using the ReqBin online tool. It enables communication with a WWW server and, thanks to this, we can download data of interest from our EasyCargo container loading calculator. Testing is one thing, but in real life, you might be using a Java plugin for your software or JavaScript calls from SAP. More information on this, the Make platform, and other real-world API use cases will be in the next post of this series.

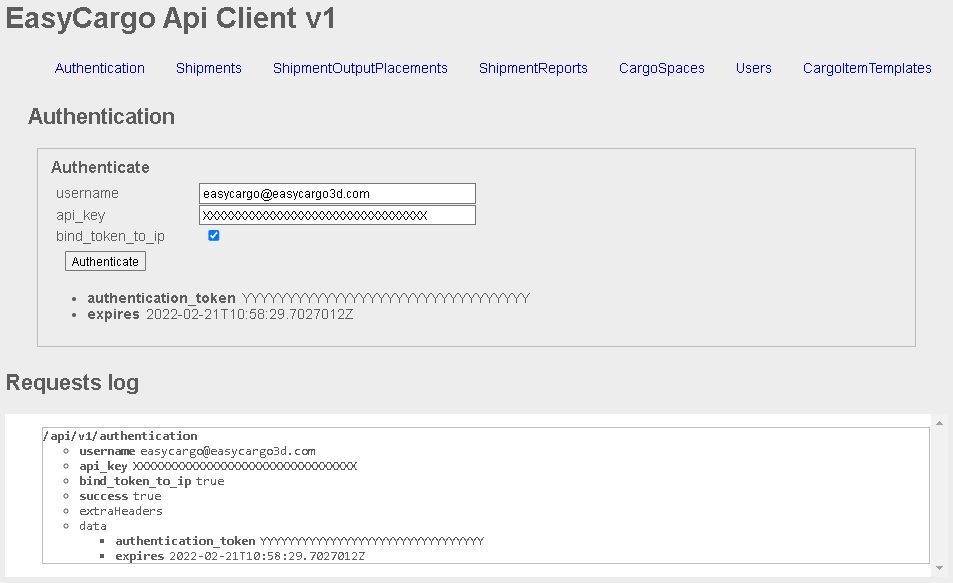
The image above shows our API client for EasyCargo. To send any API requests to the web server, the client must first be authorized. The start request is a POST https://go.easycargo3d.com/api/v1/authentication with the username and API key in the content. You will receive an authentication token from the server in the response. Each subsequent (unless otherwise noted) API request should be authenticated by adding the obtained token in its header. It is worth noting that all API requests are made on behalf of the token owner. Requests and responses must be created in JSON or XML format.
Now that we’ve been authenticated, let’s finally get to the more interesting and fun part of the API. Let’s assume that user X has the following shipments stored in their account:

We will practice API requests on them because shipments are probably the most important part of EasyCargo. Other requests, such as user management, are formulated in a similar way. Furthermore, we believe that every reader of this article will be able to handle the creation of other requests. In our API documentation for EasyCargo, every method of the programming interface is described and explained.
API requests about shipments
As the API documentation informs us, with properly worded requests, we are able to get a list of all shipments from the server, as well as data about a specific shipment from the EasyCargo account. We can even create or delete a shipment from the account.
Getting the list of all shipments

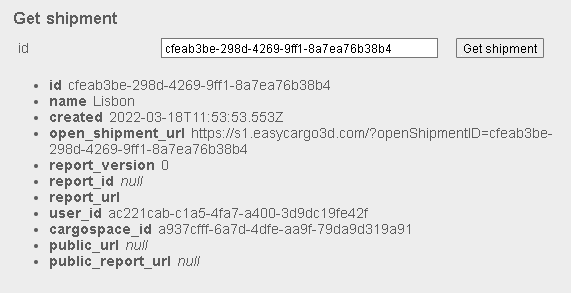
Getting data about a specific shipment

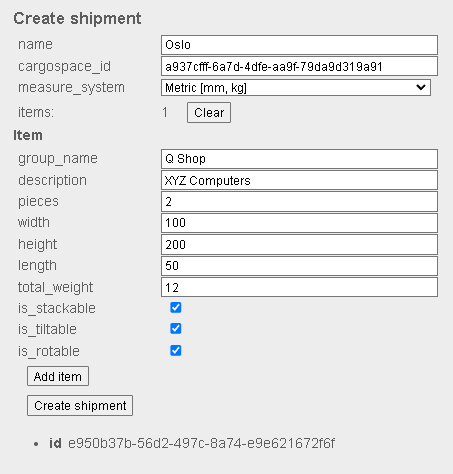
Creating a shipment


As you can see, the shipment was successfully saved to your EasyCargo account.

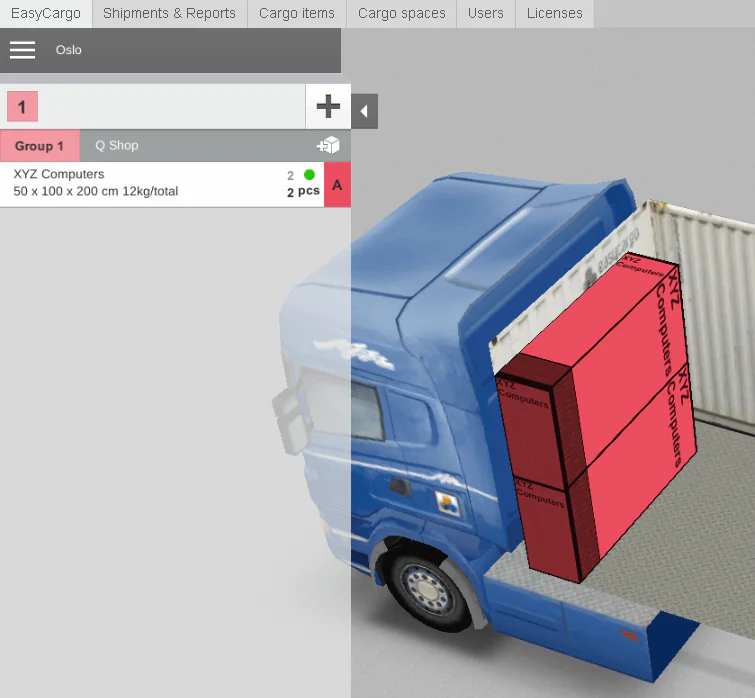
You can simply open the shipment created by the API method in your application.
Deleting a shipment


The shipment was correctly removed from your EasyCargo account with the appropriate request.
A few more words about the API
- The number of API requests is limited to 60 requests per 1 hour. This limitation is on a moving time frame. Therefore, the time of day the limit is reached can vary.
- API errors are sent back by common HTTP status codes. In most cases, the response body contains a specific message about what went wrong.
- The load planning calculation cannot be executed through the API.
Your API client has to support access to the request, modification of the request and response headers, and parsing in either JSON or XML data format. - The API user has to sign into the EasyCargo application so that the calculation of the load plan can be processed.
- Some API methods support the use of optional parameters. You will naturally learn the meaning of each of them from the documentation. You can use these parameters, for example, when requesting a list of all payloads. Just add them to the resource address after the “?” character, separated by the “&” character in the form name=value, e.g., https://go.easycargo3d.com/api/v1/shipments?from=2020-01-02&offset=0&limit=100.
Concluding this article, API is a very useful service. We hope this practical description has explained more about how a programming interface works. This article was the second in a series about the API for EasyCargo, so if you haven’t read the first part yet, you can find it here. This programming interface opens a floodgate of possibilities. In the next post, you will find out what benefits you can get from using our API and learn about its real-life use cases.


